Friday, July 18, 2014

Flash Card Books

Kidster has gotten to an age where she doesn’t just chew on books.  She’s actually interested in sitting down (in my lap of course!) and reading her little board books.  I really want to make sure that she’s as well prepared for school as I can make her.  I shopped around on Amazon.com for flash cards and they all range from $4 for a box of 50 up to $50 for a whole curriculum.  Flash cards aren’t going to be the sole form of education in this house but they will certainly provide a good visual aid.  Especially when we’re eating lunch or waiting in line at the store. 

Kidster and I look at the pages and I tell her what is on them.  A letter or a number or a color, etc.  You can also use the books for faces of family members to help learn names.  It will start to get really fun when she’s telling ME what is on the page!

 Flash Card Book

Check back next week when I share a cheap ‘hack’ for loose cords in the nursery.

What is YOUR favorite educational project?

~Lisa

Thursday, July 17, 2014

Propagating Peace Lily

Peace Lily’s are beautiful house plants that can grow quite large and have exotic white flowers.  These are generally easy to care for in a window sill with a bit of water now and again. 

My favorite thing about the Peace Lily is that they multiply quite easily.  You can plant one in a large pot and let it run wild or you can pot a small one in a windowsill pot and occasionally remove the ‘babies’ to their own pot. It’s not difficult and very hard to damage the plant. 

This a great ‘go to’ gift for a new homeowner, Mother’s Day, birthday, or “Welcome Wagon”. You could print up a little note, put the newly potted baby into a gift bag and there you go!

I let my own Peace Lily go a bit too long before separating the babies.  If you keep an eye on them you easily see when it’s made more and it is a lot less complicated to separate.

Pull out the whole plant. IMG_2470

Find where there new plants growing from the ‘parent’.IMG_2471

Repot new growth into a new pot. Enjoy!IMG_2472

It’s really hard to kill these plants but it’s nicer to use your hands instead of scissors to separate the new growth from the parent plant.  This one plant had made 4 new baby plants!  It was a bit like detangling yarn but the kids were asleep so I just jumped right in.  It’s normal for a few leaves to die after replanting so don’t worry if you see a bit of yellow in a few days!

What is YOUR favorite type of houseplant?


-Lisa

Wednesday, July 16, 2014

Scrambled Egg Waffle

Every Wednesday I’ll be posting a new recipe that uses the waffle iron.  You know, that weird kitchen appliance gathering dust on the top shelf of that forgotten cabinet?  It’s so easy to use and a lot less heat in the kitchen than an oven or a standing at the stove.
I love to make eggs for the kids in the morning but I get tired of making the same thing every few days. (Check out my post, Mini Cheese Omelets)  This is just as easy as the omelets but adds a bit more fun to Kidster’s breakfast.
I originally came across this recipe on Weelicious Waffle Iron Eggs.  My waffle iron is a bit larger so I doubled the recipe.
  • 2 Eggs whisked together
  • 1 tsp milk
  • 1 T shredded cheese
  • Salt and your choice of seasoning (I love herbes de province in eggs)
  • *I also added finely shredded spinach so the kids didn't know they were eating veggies.
Such simple ingredients!

IMG_2680Turn on and preheat your waffle iron.  High temperature works best. Once preheated pour mixture onto waffle iron.
IMG_2681Cook for about 4 minutes.  Eggs are super fluffy and delicious!

What is YOUR favorite waffle iron recipe?
~Lisa0

Tuesday, July 15, 2014

Natural Curls in 15 Minutes

I have long thick hair that holds a curl very well but there is just SO much of it that I avoid curling it because trying to keep the sections separated and uniform is really hard to do.  Getting the strands at the back of my head is really a pain too.  Imagine the black and white video portion of the ‘As Seen on TV” items.  “Ug! It’s Too hard!”  Well.  Rather than spending $19.99 for something that doesn’t work Abut just looks like it does through the magic of TV try this little trick.  If you have normal to thin hair you can use just a regular pony tail and not have to turn to the piggy tails. 

My baby sister was in town and babysat for Kidster last night.  I told her about my new favorite way to curl my hair.  It was an offhand comment between our QuizUp matches but she seemed to take it to heart.  She texted me at 10:49am “Tried curling my hair in piggy tails and it’s life changing.”  My response, of course, was “LOL!  I know, right?!”  To which she said, “It took like 15 minutes”.   That’s when I told her she had to be my To Neat Tuesday model.  Because all ladies need to know the super easy trick to flowing pretty curls without all the yoga moves.

She came over and spent some time teaching Kidster to blow into the whistle on her keychain and then we got to work.

Put hair up into a high pony tail for normal to thin/fine hair.  Put hair up into high piggy tails for normal to thick hair.

IMG_2989

Curl hair in one piggy tail.

IMG_2990

Curl hair in the other piggy tail.

IMG_2981

Let curls cool.  Once cool remove rubber bands.

IMG_2991

My iron wasn’t hot when we started so one side isn’t as curly as the other… My fault.  Still, looks pretty great!

IMG_2984

My baby sister, Jamster. 

IMG_2992

What is YOUR favorite hair trick?

-Lisa

Monday, July 14, 2014

Summer Porridge / Overnight Oatmeal

My usual weekday morning is pretty slow and relaxed.  Wake up at 6:30am.  Wander into the kitchen.  Let the dog out. Make coffee. Brush teeth. Empty dishwasher.  Prepare mug of coffee.  Load dishwasher. Update my Facebook/Twitter/Blog/Influenster/etc.  Enjoy said coffee. 

But then all to soon Little Man is here.  Then Kidster wakes up and wants “Noh” (her way of saying milk) and banana’s and ‘toons.  So everything goes from relaxing and slow moving to hectic and crazy in less than 60 seconds.  My usual breakfast is the leftover pieces of toast and squished banana.  Not very healthy or filling.

That was until my fellow Mommiester, McMommy, mentioned overnight oatmeal (refrigerator oatmeal).  I was intrigued.  There are so many different recipes but I just wanted the facts, ma’am.  It’s pretty simple.  Equal parts.  Yup.  All those summer porridge / overnight oatmeal / refrigerator oatmeal recipes you’ve been pinning on Pinterest don’t break it down as well as I’m doing here.  Equal PARTS.  EQUAL parts.  Once you get that down the sky is the limit.  Or at least the top shelf of the fridge.  You don’t have to use a mason jar either.  You can use a plastic storage container.  Or do what McMommy does and use the peanut butter jar when it’s pretty much ready for the rubbish bin.  Same goes for jam and jelly jars.  Anything that can be sealed and refrigerated folks.

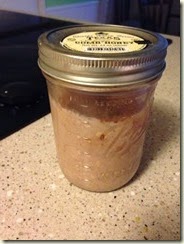
My favorite ‘recipe’ is what I made the other night.  1/4 cup oats, 1/4 cup full fat Greek yogurt, 1/4 whole milk, a sprinkling of milk chocolate chips, 1/2 T of honey, chopped almonds, and cocoa.  Stir cover and chill for about 12 hours.

photo 3My usual suspects. Honey, peanut butter, Trader Joe’s organic multigrain hot cereal, Hershey’s cocoa, Greek Gods yogurt and a mason jar.

 
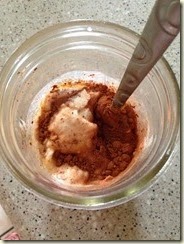
photo 1Put it all into the container and stir, stir, stir.  Chill for 12 hours.
20140714_112137193_iOS

All mixed up and ready to chill.

The next morning you can take it with you and eat it on the bus or you can do what us mom’s do and take a few spoonful's at a time while the kids are distracted.  Only two bites and you’re full for the next thirty minutes!  I use the Trader Joe’s Organic Multi Grain Hot Cereal but you can use any kind of NON instant oatmeal.  The texture is a lot like rice pudding.  Reminds me a lot of the place in NYC, Rice to Riches.  Mmmmmm, my favorite place when I was pregnant with Kidster and visiting my friend in NYC.  It’s so tasty it could be dessert!

What’s YOUR favorite cold breakfast food?

~Lisa

Friday, July 11, 2014

Dollar Store Sensory Bag

I love the dollar store.  I can go on a shopping spree and only spend $20!  I’ve been pinning so many different dollar store kid fun ideas I figured it was time to actually DO one.  I had originally pinned the idea from this mom: Play At Home Mom.

Here’s what you’ll need:

  • Biggest bottle of hair gel available
  • Glitter
  • Food coloring or finger paint
  • Sandwich Bags or larger
  • Packing tape
  • Cardboard
 
IMG_2946

Use whatever cardboard you have around the house. 

IMG_2948

Cut to the size of the bag.  Leave space for the tape.

IMG_2949
Fill bag with gel.  The less gel the better for writing practice. Squirt in some food coloring and glitter.
IMG_2950
Tape a border around the baggie to the cardboard.
IMG_2953
Cut to fit high chair tray if needed.
IMG_2952
Kidster loves it!

What is YOUR favorite kid craft?

-Lisa

Thursday, July 10, 2014

Gardening with Wine Corks

I’m a big fan of reusing junk around the house.  I have to be careful or I end up becoming a little ‘hoardy’ as Hubster calls it.  Thankfully I have a lovely vase that I keep all of my many many (too many maybe) wine corks in.  Thus, it’s ‘decorative’ and not hoardy! 

I have a delightful little Peace Lily that I bought on eBay (I know, crazy that you can buy plants on eBay!) a few weeks before I had Kidster.  It has now multiplied as they are known to do.  I have a few pots from Ikea that do not have any drain holes in them.  In the Houston humidity it is a must for plants to have adequate drainage or you end up with root rot and no one wants root rot! 

The pots were a bit too shallow to use my trusty river rocks so I racked my brain trying to find a suitable alternative. I traversed the internet far and wide and came across a few different blogs that mentioned using corks in the bottom of the pot.  Thanks to Apartment Farm I found someone had done this very thing.  I didn’t want to make a huge mistake in case corks had some kind of anti-plant chemical in them.

It’s a pretty straightforward idea.  Slice corks into little disks and line the bottom of the pot in 2 layers.  This allows the water to drain and NOT sit in the soil. The sad part is that no one will ever know they are there but you and who doesn’t like to show off their work?

Slice the corks about a half inch. IMG_2467

Place the pieces in the bottom of the pot.  About two rows. IMG_2468

Fill with soil and plant.  Lovely!

IMG_2472

What a great way to use up the “decorative” corks around my house!


What is your favorite way to reuse wine corks?


-Lisa