Showing posts with label Mealtime Monday. Show all posts

Monday, July 28, 2014

Homemade Honey Nut Cheerios

Recently our local market had huge boxes of cheerios on sale for a pittance.  I bought them because Kidster and Little Man will eat them with a banana for breakfast and I hoping Hubster would replace his usual kolache at work for something a bit more healthy.  Kidster started to get bored with them and I wanted to ‘season’ them a bit when I came across this blog post Homemade Honey Nut Cheerios. 
The ingredients are pretty straightforward:
  • 2 Cups Cheerios
  • 1 T honey
  • 1/4 t almond extract (next time I’ll use less, it was a bit over powering)
Put everything into a pot on medium heat.  Stir to make sure it’s all being well coated.  Continue for about 3 minutes. 
Cool on a pan or silicone mat.  We ate them right away and they were really sticky.  The blogger recommended leaving them on the pan/mat overnight to let the honey really soak in and they should be less sticky.  I need to do that next time for sure. 
Kidster wasn’t too sure about the sticky mess, Little Man was too young to have honey at the time, but Hubster and I loved them.  I wonder if next time I could just roll them up into balls and bake for a bit to crunch them up?
DIY Honey Nut Cheerios
Check back next Monday when I show you how to make simple baked mini corn dogs!
What is YOUR favorite Cheerio recipe?
~Lisa

Monday, July 21, 2014

Mac and Cheese Bites

Kidster and Little Man are not big fans of mac and cheese or pasta in general so I thought maybe if they were in a more handheld form they would be a bit more interested in it.  These were a big hit with both kids and adults alike!  Hubster couldn’t stop eating them!  They were pretty easy but had quite a few steps.  I didn’t have any breadcrumbs on hand so I used pulverized and seasoned Cheerios.  The ‘milling’ blade that comes with the Baby Bullet came in super handy!

I don’t have a link to any particular recipe.  I just did a bit of research and used a few different recipes as a guideline.

1 cup elbow macaroni (veggie pasta version)

1 1/2 cups shredded cheese
1/2 cup breadcrumbs 1/2 cup milk
1 tsp olive oil salt and pepper
1 egg flour
1 T half and half or
1 1/2 tsp butter
cooking spray
  • Boil 1 cup of elbow pasta (I used the veggie pasta version) for 8 minutes.  You want the pasta to still be firm.  Next time I think I’ll use the ditalini pasta.
  • Mix breadcrumbs or pulverized Cheerios (I added pizza seasoning to the Cheerios) with olive oil.  Enough to make it a crumbly texture.  1/2 cup of breadcrumbs and 1 tsp olive oil.
  • Preheat oven to 350.
  • Drain pasta and return to pot.
  • Beat together one egg and 1 T of half and half (or 1 1/2 tsp butter, whatever you would add to make scrambled eggs).
  • Add egg mixture to pasta making sure all pasta is coated.
  • Alternate mixing a cup of shredded cheese and 1/2 cup milk into the pasta until a sauce is made. 
    • It is important that the pasta and the pot are still warm but not on the still hot burner.  You want a more 'soupy' texture than your average mac and cheese.  This will make sure all the pasta is kept moist while baking. You'll want to keep aside an extra half cup of shredded cheese for the topping.
  • Spray the mini muffin pan.  Then flour the pan.
  • Use a tablespoon  or cookie scoop to spoon the pasta into the muffin pan.    The “muffins” won't rise or shrink so however you fill it is pretty much what you'll get.  You'll want to make sure that the sauce is covering the pasta.
    • Allow the sauce to 'reserve' in the bottom of the pot to pour over at the end before you put the breadcrumbs on top. 
  • Cover the muffins with shredded cheese and generously sprinkle the breadcrumbs.  I would use about a half tablespoon of crumb mixture on top to help the pasta stay moist.  Better to err on the side of too much than too little.
  • Bake for 15 minutes

I baked it for 15 minutes and checked them.  You want the topping to be browned.  I wasn't sure about the cheerios topping browning (I eyeballed the olive oil..).  I baked them for another 6 minutes.  I'm pretty sure they would have been fine at 15 minutes though. 

Mac and Cheese Bites

Next week I’ll show you how to make your own Honey Nut Cheerios!

What’s YOUR favorite mac and cheese recipe?

~Lisa

Monday, July 14, 2014

Summer Porridge / Overnight Oatmeal

My usual weekday morning is pretty slow and relaxed.  Wake up at 6:30am.  Wander into the kitchen.  Let the dog out. Make coffee. Brush teeth. Empty dishwasher.  Prepare mug of coffee.  Load dishwasher. Update my Facebook/Twitter/Blog/Influenster/etc.  Enjoy said coffee. 

But then all to soon Little Man is here.  Then Kidster wakes up and wants “Noh” (her way of saying milk) and banana’s and ‘toons.  So everything goes from relaxing and slow moving to hectic and crazy in less than 60 seconds.  My usual breakfast is the leftover pieces of toast and squished banana.  Not very healthy or filling.

That was until my fellow Mommiester, McMommy, mentioned overnight oatmeal (refrigerator oatmeal).  I was intrigued.  There are so many different recipes but I just wanted the facts, ma’am.  It’s pretty simple.  Equal parts.  Yup.  All those summer porridge / overnight oatmeal / refrigerator oatmeal recipes you’ve been pinning on Pinterest don’t break it down as well as I’m doing here.  Equal PARTS.  EQUAL parts.  Once you get that down the sky is the limit.  Or at least the top shelf of the fridge.  You don’t have to use a mason jar either.  You can use a plastic storage container.  Or do what McMommy does and use the peanut butter jar when it’s pretty much ready for the rubbish bin.  Same goes for jam and jelly jars.  Anything that can be sealed and refrigerated folks.

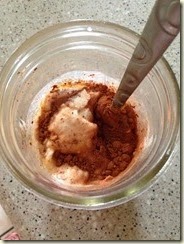
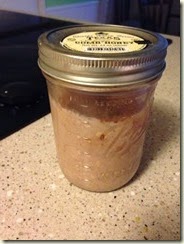
My favorite ‘recipe’ is what I made the other night.  1/4 cup oats, 1/4 cup full fat Greek yogurt, 1/4 whole milk, a sprinkling of milk chocolate chips, 1/2 T of honey, chopped almonds, and cocoa.  Stir cover and chill for about 12 hours.

photo 3My usual suspects. Honey, peanut butter, Trader Joe’s organic multigrain hot cereal, Hershey’s cocoa, Greek Gods yogurt and a mason jar.

 
photo 1Put it all into the container and stir, stir, stir.  Chill for 12 hours.
20140714_112137193_iOS

All mixed up and ready to chill.

The next morning you can take it with you and eat it on the bus or you can do what us mom’s do and take a few spoonful's at a time while the kids are distracted.  Only two bites and you’re full for the next thirty minutes!  I use the Trader Joe’s Organic Multi Grain Hot Cereal but you can use any kind of NON instant oatmeal.  The texture is a lot like rice pudding.  Reminds me a lot of the place in NYC, Rice to Riches.  Mmmmmm, my favorite place when I was pregnant with Kidster and visiting my friend in NYC.  It’s so tasty it could be dessert!

What’s YOUR favorite cold breakfast food?

~Lisa